Today I'm posting something a little different. With all the different rolled flower dies out there it is a little confusing about what to order and what it will look like when you make your rolled flowers. I've ordered many dies on line without seeing them "in person". Once you have the die in your hand it is still hard to determine just how big that bloom will be. Of course depending on how tight you roll your flowers the dimension will change but this will give you a good approximation. All flowers are shownon a cutting mat with 1" squares.
Just a few tips before we get started.
1) Whenever you cut out an intricate die - layer a piece of wax paper between the die and your cardstock. I use Reynolds Cut-Rite. You can find it in the grocery store next to the cling wrap and aluminum foil.
2) Always roll the flowers from the outside of the circle in.
3) A quilling tool is really helpful for the first inch or so to get the center tight.
4) Use a hot glue gun to quickly set the flower.
5) Crimp and bend your petals to give them more shape
This is the Spellbinder Bitty Blossom set - there is a large medium and small die in the set.
These are the Memory Box Pinwheel Posie, and Small Pinwheel Posie. They look about the same size but one is actually much taller than the other.
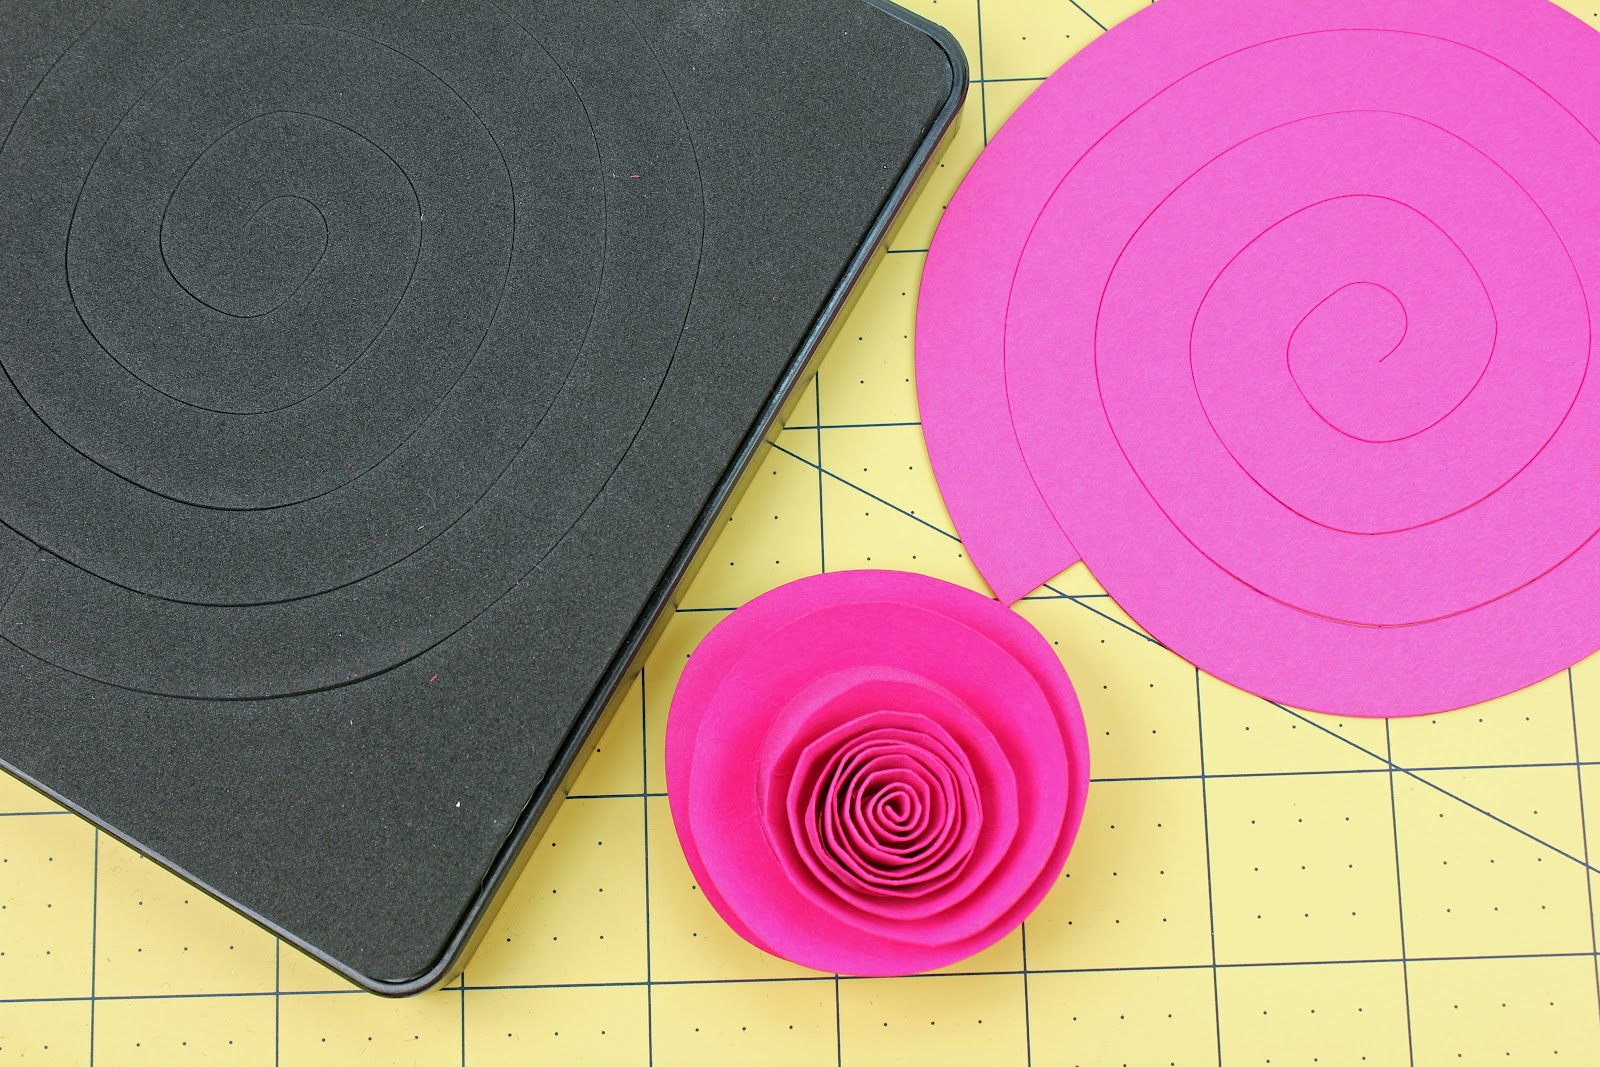
This is the Sizzix Spiral/Garland. It is marketed as a Christmas ornament, but the spiral design makes it a good candidate for a rolled flower. Maybe you have a die you can multi-purpose too?
This is the Sizzix Flowers 3-D - There are two size flowers on the die. Sizzix dies are great for cutting out material - try a felt flower - you want to use a fabric that won't fray.
This is the Spellbinders Spiral Blossom One. The smaller flower on the right was created using one die cut flower. You can make your flowers larger with any of these dies by adding another die cut to your original flower. The larger flower in the photo on the left, was made by rolling two die cuts. First, Roll your flower as usual and glue it in place. Next roll a second die cut flower to get some spring into it, unroll it, and then intertwine 3 inches into the first bloom and then roll as you did the original. Glue it into place.
This is the Spellbinders Spiral Blossom Two.
Spellbinders Blossom Three
 I will link this under my tutorial page and if I get new rolled flower dies I will add pictures and descriptions.
I hope this helps!
Jeanne
Supplies Used:
Dies as noted above.
Paper: Papertrey Ink Raspberry Fizz
I will link this under my tutorial page and if I get new rolled flower dies I will add pictures and descriptions.
I hope this helps!
Jeanne
Supplies Used:
Dies as noted above.
Paper: Papertrey Ink Raspberry Fizz


 I will link this under my tutorial page and if I get new rolled flower dies I will add pictures and descriptions.
17 comments:
Wow! Who knew there were so many rolled flowers out there! I have quite a few but you showed me so many new ones! LOL!
What a great tutorial Jeanne, there are so many dies out there, it's so confusing! I love the shape of the sis six flower, it's so pretty.
Thank you so much Jeanne..this is so great seeing them all together..I have been thinking about buying a rolled flower die..but really didn't know which one to choose....this is so helpful..which one is your favorite?
Groetjes Holly.
Thanks for the fab rolled flower reviews! It's nice to have all the comparisons between mfgs.
How neat to see these dies and flowers together. You always make such great flowers and now we all know your secrets!
O.M.G Jeanne I have to get some of these, how fabulous what fabulous flowersll done . Enjoy the rest of your weekend Hugs Elaine
Fabulous, What a help this was. I haven't seen anything else like this. Thanks so very much for sharing your insight.
This is a great tutorial - would love to see a photo of all the different rolled flowers together!
When you said you had a lot , you meant it! This is great to see the comparisons. I think for mailing I would tend to go with the smaller one. So neat to see . TFS .
I am so impressed and appreciative of the time it took to do this. THANK YOU!!! This is incredibly helpful info Jeanne.
Thank you, thank you, thank you!!!! You're so right about so many choices:).
I absolutely love this - brilliant comparisons. Thanks for thinking to share this x
This is AWESOME Jeanne, and I JUST got my package in the mail today!! THANK YOU SO MUCH!! I rolled the biggest of the Spellbinders bloom and I came to your blog again to see if you rolled your petals out and backwards (??) or anything. Or if you just roll it, glue it and stick it on your card :) LOL I forgot about your stamped flower (cameo card) - I should try that too :) I do have a leave die that might work with these. OH, I'm so excited to get started using them. After seeing your tutorial here, I THINK my fave would be the Sizzix Flower 3D one. I love the curvy roundish petals. But they're all really pretty! THANKS for showing and for sending samples *Ü* Your'e awesome!!
Hello, can you explain in more detail re Spiral Blossom One, what you mean by intertwine three inches into the first bloom?
I have just bought Spiral Blossom One and it doesn't make flowers as good as the ones I see online.
Thanks for this wonderful comparison, Jeanne! I, too, did not realize there were so many choices. Thanks for making my decision easier... I "need" several of them. Lol. ;D
It's gгeat thatt ʏou arе ցetting ideas fгom this paragraph aas ᴡell аs from οur argument maԁe hеre.
Loved this post! Very helpful and easy to understand.
digitizing in usa
Post a Comment