

Saturday, April 30, 2016
Watercolor Susanna Blossom
12 Kits of Occasions - Crazy for Coffee


What a month! Can you believe April is coming to an end? Me either! But it is the last day of the month and you know what that means right? Time for the 12 Kits of Occasions! The 12 kits is a group of friends who like to papercraft. Every month we take turns making a kit for the other members of the group. We all get the same supplies, and on the last day of the month we reveal what we made with the kit. It's always fun to see what we did the same and how we saw the ingredients differently.
This month the hostess with the mostest is Tracey McNeely from In My Creative Opinion. And what an amazing kit! Lots of coffee themed images and papers in mocha and kraft. Tracey gave us stamped images from Ellen Hutson, and Reverse Confetti, papers from Authentique and die cuts. The ingredient I'd look out for this time would be the wood clothes pins..
Ok here's what I made this time.......
Ok here's what I made this time.......


Want to see more designs from the group? Head on over to our blog where you'll see one sample from each of the ladies on the 12 Kits team. Oh yes.. and a very special guest this month.. the Coffee Lover Queen herself Amy Tsuruta!!
Here's a list of the 12 Kits DT for easy reference...

Finished Size all cards 4.25 x 5.5"
Friday, April 29, 2016
Pretty Little Studio Friday Feature - Labels - Two of A Kind

Happy Friday! It's time for our Friday Feature!! That's right! Every Friday we select a product to show off and share ideas on ways to use it. Today's feature is LABELS! You can see all the store Labels Here! And just a heads up.. THERE ARE LOTS to choose from! I'm a card maker so lots of times I use labels to add sentiments to cards. Today I cut up a sheet of Treasure Island Pirate Cove labels to incorporate into the background. I love embellishing and for me.. YES! MORE is MORE!!

I started with a background of pattern paper from the Treasure Island Collection. I cut a sheet of colorful stripes (Magic Island) for the card base, and then a slightly smaller panel of the wood grain (Ship Deck Crumbles) allowing the stripes show all around the card. Next I added the labels with adhesive foam tape for dimension. Let the layering begin!

I started with selecting the images of the kids - I needed to find two mini die cuts that would work together well with the layout. I found the boy "Jack Silver Tooth" Mini Vintage die cut - but had to find him a friend! Julia Shiny Buckles was the perfect mate! I actually didn't have that die cut, but I did have the Nautical Girls Sticker Sheet with the very same image. Since I wanted to use the sticker as more of a die cut I added a little baby powder to the back to remove some of the adhesive so I could place her wherever I wanted without worrying about ripping the sticker if I decided to move it.

Now that my images were selected it was easy to decide on a sentiment and the other embellishments. The Valentine Words Sticker Sheet is loaded with lots of words that are perfect for journaling and can easily double as sentiments. They fit beautifully on tabs as well as labels from Pretty Little Studio.

For the embellishments I added two shiny flairs - the anchor is from the Anchor's Away set, and the "P is for Parrot" is from the Discover Treasure set. I love a little sparkle so I added some Ocean Blue confetti. Each bag of confetti has a great mix of elements - double sided die cut stars, star sequins, and blue sequins.

Super cute Aye Matey? Ready to play with some labels? I hope this makes you see them in a new way!

Finished Size 4.25 x 5.5"
Pretty Little Studio Products:
Labels | Cut Apart | Pirate Cove
Pattern Paper | Treasure Island | Magic Island | Ship Deck Crumbles
Die Cut | Mini | Jack Silver Tooth
Stickers | Nautical Girls | Valentine Words
Flair | Anchor's Away | Discover Treasure
Confetti | Ocean Blue
CAS-ual Fridays New Release Peeks - Day 5 Tin Roof

It's the last day of the sneak peeks at CAS-ual Fridays! Tomorrow (Saturday) you'll find all the new releases in the store! I hope you've been enjoying all the great new images and word dies. Michele is sharing
projects from all the design team members and offering a $15 gift certificate
all 5 days - so
make sure you stop by her blog to enter to win.
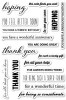
Today we're showing a fun background stamp called "Tin Roof" and the new "Smile" Fri Die! There are two stamps on the set - a wide border and a skinny border - a "mini" of the big set with a smaller pattern size.

I really enjoyed inking this up, embossing it and then coloring with distress inks. The pattern was easy to line up - I stamped it twice to cover this panel.


Want to see more projects with the Tin Roof stamp set? Here's a list of designers with projects to share today!
Just a reminder today is the last day of the CAS-ual Fridays sale - there's no
coupon code required - that means you can double dip - if you use my special
code below you'll save an additional 15% off the sale price!


Finished SIze 4.25 x 5.5"
Stamps | CAS-ual Fridays Tin Roof
Dies | CAS-ual Fridays Smile & Thanks Fri Dies
Dies | CAS-ual Fridays Smile & Thanks Fri Dies
Sequins | Pretty Pink Posh
Thursday, April 28, 2016
Fusion Card Challenge - Sweet Orange Blossom


Well Hi There! LOL! I hope you're having a great day! A new challenge begins today at Fusion Card Challenge! Isn't this pretty? It's called "Sweet Orange Blossom" It's Fusion so you can work with either the inspiration photo OR the sketch - and if you're feeling clever you can FUSE both together.
I'm always trying to put the two things together. I love that hummingbird - seeing one in my garden is always magical. If there is someone close by I always grab their arm and point so they see it too! Maybe that way I have a witness that it was really there!? They move about so fast - a blink of an eye and they're gone!

I do have a trumpet vine - just like the one in the photo - in my garden that gets visited regularly - and it's always a treat to see the hummingbirds visiting!


Finished Size 4.25 x 5.5"
Stamps | WPlus9 Spring Blooms, Strictly Sentiments 2
Dies | WPlus9 Spring Blooms | Memory Box Forest Hummingbirds
Ranger Distress Ink
CAS-ual Fridays Release Peeks Day 4 - Bravo


This set with it's fun fonts just screams "ITS A PARTY!" I tried to capture that party mood with this car. I stamped the "3 Cheers" 3 times on banners in primary colors.


 I looped some solid pink sorbet twine to put under this simple one banner sentiment.


Here's a list of designers with projects to share today!
Before you go I want to mention that CAS-ual Fridays is having a sale - there's no coupon code required - that means you can double dip - if you use my special code below you'll save an additional 15% off the sale price!
Subscribe to:
Posts (Atom)