Showing posts with label Top Dog Dies. Show all posts

Thursday, December 10, 2015

Fusion Card Challenge


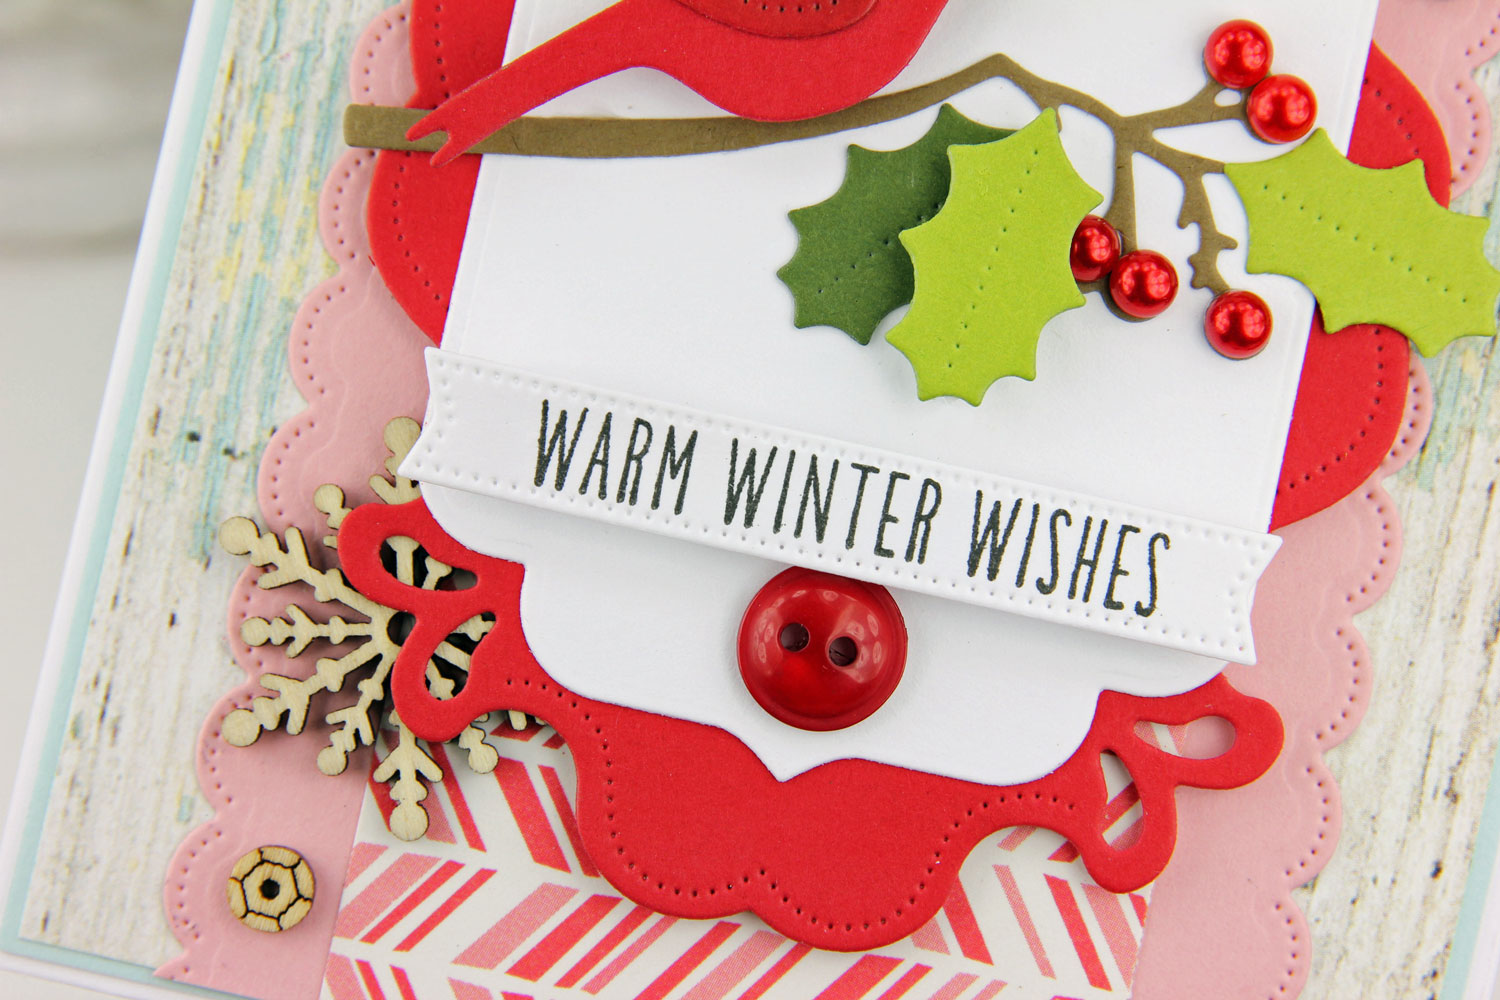
Hi and thanks for stopping by!  We have another beautiful challenge for you at Fusion this time.    It's hand picked for the Holidays!   You can work with the inspiration photo OR the sketch.  If you're feeling clever just FUSE them together like I did.  But first.. check out that photo.. .what do you love about it?  Me?  I love nature so the birds, berries, and pine branches were a treat for these eyes. 
For the focal point of my card I layered some solid card stock, and made a scene of a cardinal on a holly branch.  For me the details make all the difference.  Red pearl gems became berries. I cut holly leaves from two different shades of green.  A brush of Copic marker on the bird wing made it a shade darker, and a bitty google eye on the cardinal brought him to life! 


Now it's your turn.  Need a little inspiration?  Just click on the names below to jump to their blogs to see more.


All the dies I used on this project are from Top Dog Dies.  Maybe you heard?  They're closing the site.  If there are any dies you've been wanting and "have to have", now's the time.  Everything in the store is 40-50% off while supplies last.

You can get all the details and link up your designs here at Fusion Card Challenge!


Supplies:  Finished Size:  4.25 x 5.5"
Stamps:  WPlus9 Heart Felt Holidays 
Dies:  Top Dog Dies Vintage A2 Mat, Pocket Page Banner, Dotted Border, Cardinals, Banners One
Pattern Paper:  October Afternoon Under The Tree 12"
Wood Snowflakes Stampin Up!,  Wood Sequins Cloud 9
Misc. Button, Red Pearls  

Thursday, November 12, 2015

The Twinery Fall Page Layout | Falling For You

Leaves are falling! What a wonderful time for a walk in the woods - or maybe a leaf fight! Hoping we're not the only ones that do that! LOL! We pile up leaves big and chase each other around throwing hand fulls of leaves at each other. I promise.. it's lots of fun!
I made this fall layout for my daughter. She and her boyfriend are both celebrating their birthdays this month. They've been together for a little over a year and I hope they will always remember that the simple things are best.
I normally add enamel dots, buttons or other round shapes to my layouts. I thought it would be fun to make some circle accents with twine. To make these just place an adhesive dot on your project (I used large - not 3D - flat dots). Starting in the center of the dot I wrapped the twine in a spiral. The Solid Maraschino Twine adds a pop of bold color. Because this is my daughter after all I had to add a few gem accents - the girl is addicted to bling. What can I say? Well.. .maybe she gets it from her mom?
All the dies I used on my project are from Top Dog Dies. I cut a label die twice, adhered them together and cut them down to size for my accent. Next I used a hole punch and punched a half circle from each side of the label. I wrapped Solid Natural Twine around the label. I love using this twine because it matches EVERYTHING. .
Here's the finished layout! I hope they look back at it years from now and smile!
Thanks for stopping by! I hope you enjoy using your Twinery Twine on all your projects and layouts for your very own precious memories!

Hugs!


Layout Size 8" x 8"
Supplies: Twinery Twine - Solid Natural, Solid MarachinoDies: Top Dog Dies Pocket Page Banner Die, Fall Foliage, Banners One, Bella Doily, Borders 2
Pattern Paper: October Afternoon Saturday Mornings
Stamp:  Papertrey Ink Autumn Acorns

Wednesday, November 4, 2015

Splitcoaststampers Shaker Tag Tutorial

I'm so excited to share that I got to work on a shaker tag/ornament tutorial for Splitcoaststampers featuring Top Dog Dies.   You can check it out here! 

Cardstock
Transparency (I used Unibind Thermal Steel Crystal Soft Cover Report Covers)
Dies:  Top Dog Dies Polar Bear, Mini Tags, Onesie Dress, Circles, Penguin, Memory Box Studio Circle Layers, Cardinal, Snowman, Pocket Page Winter, Water
Sizzix Big Shot with Magnetic Plate
Pretty Pink Posh:   Sequins and Mini Beads
Twinery Twine
Ribbon May Arts
Stamp:  Waltzingmouse Stamps Nutcracker Sweet

Monday, October 26, 2015

The Card Concept - Autumn Beauty


Wow it's been a while since I played along at the Card Concept.  They're back from their Summer  hiatus and now I am too! LOL!  Have you played there yet?  They present you with an inspiration photo - isn't this time a beauty?  And.. you create in your style.  They show a take on the challenge from each of their DT members who specialize in a certain "style" from CAS (clean and simple) to Shabby Chic.  I thought I'd pull out all the stops for this one and go full on heavy embellies.  I'm thinking this one is Shabby Chic.. you tell me.. I'm also thinking I could be Classy & Elegant (I see some sparkle) or even Freestyle Collage since I have some unrelated elements in my design like the wood sequins stapled sentiment, and stick pin.   

I'm smitten with the photo this time and used lots of elements from the photo on my design.


I love Tim Holtz memo pins - when I'm not inserting a little sentiment in them I like to add a big gem to the center. 
I inked up the edges of the pumpkins with distress ink to add a little dimension.   The roses and pumpkins are straight from the photo.  All the dies on this card are from Top Dog Dies.
I seem to always be adding a bit of twine to my projects too - it just seems to anchor everything to me so that the images don't appear to be floating in space.
This photo shows you the dimension from adding the pumpkins with adhesive foam tape.  Yes.. this card will need to be hand delivered!  Thinking my Mom will get this one.
Feel like playing yet? There's lots of time since The Card Concept Challenge is twice a month! Maybe I will see you there?


Supplies:  Finished Size:  4.25 x 5.5"
Dies:  Top Dog Dies Pumpkins, Madison Doily, Cherish Doily, Borders #2, Pocket Page Banner
Twinery Cappuccino Twine
Stamp:  PTI Autumn Acorns
Pattern Paper:  Pink Paislee Cedar Lane
May Arts Ivory Button Twine, 1/2" Wrinkled Ivory
Paper Flowers Iamroses.com
Tim Holtz Pin/Mini Staple
Gem
Wood Look Sequins Serendipity Stamps

Friday, October 23, 2015

Tag You're It! Challenge #33 - Ghostie Tag

Do you love tags?  I know I do.  I love the way they can dress up anything from a gorgeous gift to a bag of chocolate chip cookies.  It's getting chilly in the Chicago area so I'm starting to bake again.  The last few times have been a total disappointment - I'm out of practice and missing something.   I mean flat chocolate chips?  Come on!  I KNOW I can do better than that!    I will keep at it - with pumpkin everything at the store I think I'll be making some pumpkin bread or pie this week.   So yes.. I love my tags!  A tag and a bow and it's good enough to give away!  
Here's the latest inspiration at Tag You're It from Kara Lynne Pogreba!  CAS goodness for you this time!  I love the cute little candy corn, zig zag border and complementing paper pattern on either end of the tag.  Ohhh.. can't forget that satiny ribbon either.. swoon!
Here's my version of CAS.. LOL!  I stuck with the pattern paper at the top and bottom of the tag and that neat zig zag border.  I kept the layout mostly white and replaced the candy corn with a ghostie! 
Now it's your turn!  I'd love to see how YOU interpret Kara Lynn's design!  Join us over at Tag You're it to see samples from the rest of the team and to link up your design!


Supplies:  
Dies:  Top Dog Dies, Ghost, Haunted House, Circle, Dotted Borders
Pattern Paper   Pink Paislee Hey Kid 6"
Corner Chomper Angle
Google Eyes
Caribbean Twinery Twine
Button
Copic Markers
Twisted Ivory Burlap May Arts
Ribbon 1/2" Stitched Polly Peach Parfait Stampin Up!

Thursday, October 22, 2015

Halloween Scrapbook Album


What a surprise for you today! I bet you didn't know I could scrapbook! LOL! I volunteered to make a mini Halloween album for my Twinery post today. After I was a few pages in I started to wonder what I got myself into. This was time consuming - each page a mini work of art - but now that it's finished I'm glad I took the time.

I have lots of pictures so grab a cuppa and let me take you on a trip. All my photos were taken by the parents of my daughter's best friend. They were kind enough to take her to one of their favorite places this time of year. I knew I had to document this so they could remember all the fun they had!


I love this pumpkin shaped album from Top Dog Dies.  It comes with a "finishers" die set that includes variations on the Jack O Lantern Face and other accessories. I used the Leaves Die set for my pumpkin - the solid honeydew Twinery Twine makes lovely tendrils for the pumpkin leaves.


This was a simple album to make. I started with scraps of cardboard - you know those pieces you can't part with - like from the back of a stack pads. Using a glue stick I adhered pattern paper to the front and back of the cardboard. Next I die cut the pumpkin album shape, and then punched holes for the jump rings. I inked up all the edges of all the pages to cover the cardboard edges and soften it up.
All the dies on my project are from Top Dog Dies. I like starting an album with the details of the trip - this is a good place for a ticket stub or a journaling card - who what where when why. I attached a little tag wrapped with Mandarin Twine. The button was easy to thread on the twine - just move it along until you like where it's placed. I think it looks like shiny candy! I also threaded the tag with several strands of Lilac Twine to make it extra foofy.

I added a little banner to this page with Charcoal Twine. Instead of leaving the ends loose I decided to attach one end to a spider with googly eyes!   The scallop border is from Borders #2 die set, and the spider?  From spiders of course!  It comes with several of the little guys with a spider web.


I added a few photos I grabbed from the farm web site to add to the album. This helps set the scene when they look back at this album.

For this page I added a few bitty spiders hanging from Charcoal Twinery Twine.  The spiders are from the Witch die set and the web from the Spiders set I mentioned. 

I punched a few holes along the outside edge of the album and threaded some colorful twine through the holes - Marigold, Mandarin and Charcoal. 
Because the holes are through the entire page you can see the pretty twine on the front and back of the page. 

This is the spinning honeypot ride! Looks like fun right?   I added some die cut Ghosts.
For the moon over my haunted house I glued Marigold twine in a circular shape. The center of the circle was misshaped - not a perfect circle so I topped it with a die cut bat.


I don't see any mistakes do you? LOL! I was originally going to put a little button in the center, but I think the bat looks great!
I punched two holes in this page so I could make a little border of Mandarin Twine to tuck my photo in.

This simple twine tied bow button makes another great embellishment for tucking into a corner to mount your photo.
Because the holes were cut through the entire page I can decorate both sides of the page. Instead of mounting photos on this side I used the twine to string a row of skulls. I left the page blank so my daughter could add a little journaling and write down her favorite memories of the day.


I threaded one piece of twine from the front side of the page and tied a bow, and I threaded a second piece of twine through the back to tie in a bow. I made sure to run the second piece (from the front) through all the eye holes so the skulls would lay flat.
I added another cute button twine bow to the end of the sentiment tag on this page. I tucked a few die cut leaves underneath.
I wrapped Mandarin twine around my fingers to form a circle and then adhered them to the page to make this loopy embellishment. A few die cut pumpkins and a star stick pin make this magical!  The pumpkins look great in white or orange! 


Another blank page for journaling.  The cute kitty is from the Top Dog Die Pocket Page Halloween die set.

End of the road for this book... getting mooned by a scarecrow!  How silly!

I hope you enjoyed this fun book and that you got some ideas for how to add Twinery Twine to your layouts to make them extra special!


Supplies Used:
Twinery Twine:  Solid Honeydew, Charcoal, Lilac, Marigold, Cappuccino, Mandarin
Dies: Top Dog Dies Circle, Windmill, Grass, Pocket Page Banner, Ghosts Pumpkin Album, Pumpkin Album Finishers, Pumpkin, Borders #2, Dotted Borders, Leaves, Pocket Page Fall, Pocket Page Halloween, Spiders, Madison Doily, Rainbow
Stamps: Paper Smooches Headlines, Captured Moments, Uplifters
Pattern Paper: Basic Grey Persimmon, Basics 
Star Pin Maya Road, Wood Veneer Stars Studio Calico

Leaf Mosaic Cover Die - Three Ways

The fall foliage is gorgeous this year! So many beautiful colors! I’m always trying to think of different ways to sneak even more color into my designs. Today I’m sharing the Top Dog Dies Leaf Mosaic Background Plate Die done three different ways.   I love background dies, they're a great way to cover up an A2 (4.25 x 5.5") card!

I will start with the most layered and finish with clean and simple.

I just discovered that the smallest piece from the Make A Banner Die Set fits perfectly behind the window of the Mosaic dies. Brilliant! 
Now I can slip some die cut pieces of color behind the die to peek through the openings.

My first card shows different colors behind the windows, and for an extra pop of color some Fall Foliage in aqua. The blue gives lots of contrast with the yellows, reds and oranges of the background.
For my second card I die cut the Leaf Mosaic from watercolor paper and added watercolor only to the leaves.
I used Peerless Watercolors – first adding water to the areas I wanted colored, and then applying the color. 
The watercolor will stay in the areas you wet first.
My last card is very clean and simple.
I wanted to show the elegance of the die, and how pretty it looks without any special treatments. I simply cut it from gold foil and adhered it to an aqua blue card base.
Do you love the Leaf Mosaic die?  Good news!  It's on sale for $24.  You can find it here at Top Dog Dies, and as always there is free shipping on orders of $50 or more. 


Finished Size 4.25 x 5.5”
Top Dog Dies: Make A Banner, Leaf Mosaic, Fall Foliage, Pocket Page Banner
Stamps Waltzingmouse Teeny Trees, Peace & Plenty
Enamel Dots