Sunday, July 31, 2016

Serendipity Stamps Challenge #58 - Add Fabric


Are you a fan of Serendipity Stamps?  For sure you'll want to check out our monthly challenge!  It's a great way to get ideas - seeing projects made with stamps you might already own, and when you link up your design you just might win our prize!   One random player is selected to receive a $20 gift certificate from Serendipity Stamps


This month we're asking you to "add fabric" to your design.  That could be a swatch of burlap, a length of lace, or if you're feeling creative maybe you will stamp on linen, or die cut some fabric!  It's up to you - just make sure you include at least one Serendipity Stamps image (stamp or die) on your design.

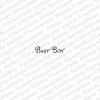
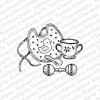
I decided to make a baby card - for a boy this time... I'm usually going straight for the pinks for girls.  
For my fabric element I added a length of pretty lace to separate my pattern papers.  Normally I do this by adding a die cut border from solid card stock.  I have to admit that the lace takes this to a new level - making this very elegant and expensive looking. 
I added a few paper roses as embellishments.  I'm not worried about keeping this one flat because where there's babyies involved I'm usually visiting in person!  If it's a shower I want to wish the new mom well, and if I get a chance to visit a new born - bonus!  Who doesn't love to hold a baby!
I stamped the Baby Bib in a very soft blue pigment ink so it has a powdery look to it.  Pigment ink sits on the top of the paper - it doesn't sink into the paper so it has a different appearance.
Click on the name of the other design team members to jump to their blog and see what they made for the Add Fabric Challenge!


Thanks for stopping by - I  hope you have time to play at Serendipity Stamps Challenge Blog!


Finished Size 4.25 x 5.5"
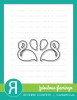
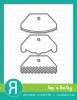
Stamps | Serendipity Stamps Baby Big, Etc., Baby Boy Small
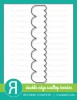
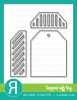
Dies | Poppystamps 1000 Small Leafy Sprig  | Spellbinder Standard Circle, Scalloped Circles
Pattern Paper | Authentique Bundled 6"
Twinery Shore Twine
Sequins | Pretty Pink Posh
Paper Flowers | Iamroses.com

12 Kits of Occasions - Christmas In July!


 Hi and thanks for stopping by!  Wow has this month gone fast!  It's hard to explain, but with the seasons so short here in the Midwest, it seems like you need a month to get in the groove of things - we opened the pool in June.. by the time you get in the swing of things - July - it seems like it's already coming to an end - August!   I can't complain.. I really love the change of the seasons... I love the colors of fall and then the magic of the holidays!  There is always something to anticipate!  That said.. we're doing a big jump forward and celebrating Christmas in July with the 12 Kits of Occasions! 


Here's a peek at the amazing kit we received from our hostess this month - Marybeth Lopez from Marybeth's Time for Paper!  If you'r not familiar with the 12 Kits.. we're a group of 12 friends who all like to papercraft.  We take turns making a kit - we each get a different month to choose a holiday and then put together a package of goodies for the rest of the team.  


Marybeth sent us pretty gold foil papers, stamped and die cut images and embellishments (see the photo above).  This kit had lots of GOLD and reflected Marybeth's classy and elegant style perfectly!

I loved working with all the items in the kit, but sometimes there are items that I find a little hard to incorporate into my designs.  The only ingredient I found a little tricky this time were the bubble embellishments - you might want to keep a look out for them.  You can see what they look like in the bottom right of the ingredient photo above.   I still have two left and will be watching to see what the ladies did with them so I can case their ideas and MAKE MORE CARDS!!! LOL!!   I made 6 this time so here goes!! 

This pretty background die is from Memory Box.  It's called the Stitched Lattice Background and you can see it here at Memory Box.

Ready to see more designs from the group?  It's fun to see how we used elements in similar ways or very different ways!  You can click on DT member names below to jump to their blog, or you can check out the 12 Kits of Occasions Blog and see one sample from each of us to get an idea of our style.  You'll also find a complete list of ingredients there!

Marybeth - Marybeth's Time For Paper (Our Hostess this Month)


Thanks for stopping by and have a great day! 


All cards finished size 4.25 x 5.5"

Friday, July 29, 2016

New Memory Box Holiday Look Book


I'm so excited to share my little project that's been keeping me busy this past month.. the new Memory Box 2016 Holiday Release Look Book!   Want to flip through the pages and see all the projects?  Just click here! 

Tuesday, July 26, 2016

Pretty Little Studio - Crab Apple

Ready for a walk in the woods? With the Pretty Little Studio Woodland Collection nature is never far! It's a beautiful mix of nature inspired elements including Monarch butterflies, woodgrain, pine trees, dandelion seeds, and gorgeous detailed die cut images that look straight from a botanical reference guide. 
Isn't the vintage die cut Crab Apple stunning? It's printed, and die cut ready to work with and coordinates beautifully with the Woodland Collection papers. The flowers are beautifully colored - so soft and delicate. To make this design even more feminine I layered a 4" Cambridge Doily under the die cut. The 4" size is perfect for A2 size cards (4.25 x 5.5").
One of my favorite items from the new Woodland Collection is the Monarch Butterflies! It's a package of die cut Monarch butterflies in different styles and an assortment of colors! You're sure to find just the right one you need to accent your project! I chose one in the same pink hue to match the papers, and pinks in the die cut crab apple.

Note flags are a great way to add a sentiment to a card. I stamped this one, but you could just as easily hand write a sentiment to personalize your projects. You can find the note cards in several of the Pretty Little Studio collections - this one is from the You & Me collection. The color matched perfectly with my Woodland Collection papers.
Do you see the striped paper on my design? That's actually a journaling card from the Wild Rose Package. I stared my card base with two different papers - the tree pattern on the top (White Oak), and the dots along the bottom. (Both patterns are in the paper packs.) I topped that with the striped journaling card, and then the doily and die cuts. I love the bit of pink stripe peeking out the top!
I'm seriously smitten with this collection - it's everything I love about the outdoors - only I get to bring it indoors!


Finished Size 4.25 x 5.5”
Pretty Little Studio Products
Paper | Woodland Collection
Die | Crab Apple | Woodland Monarch
3x4” Card | Wild Rose
Doily | 4” Cambridge
Note Flags | You & Me Forever
Stamp | Pretty Pink Posh Darling Friends
Clear Sequins

Saturday, July 23, 2016

Weeping Cherry Triptych


Have you seen the Poppystamps Triptych dies? What's a triptych right? It's a work of art that's divided into three sections. Poppystamps has several triptych dies to choose from. The one I'm using today is the Weeping Cherry. I think it has a very Asian look to it - the cherry blossoms delicately hanging from the branches. I wanted this to be very clean and simple - and let the image do all the talking.

I cut a panel of white card stock with the Weeping Cherry Triptych die and mounted it on pink card stock . I used a Sakura Quickie Glue pen to adhere the cut out panels into the open windows.
This is a very clean and simple card - all that was left to do was add a sentiment. I used the "thank you" from the Flower Patch clear cling stamp set. I was really tempted to color in the open letters on the word "you"!

In the end I decided I needed something to draw the eye to the sentiment so I added a scatter of Butterfly Sprinkles in gold foil and shades of pink.
The white in contrast with the deep rose background is stunning! this style die would make a beautiful shaker card as well. I wanted to keep mine flat for easy mailing.
The triptych dies are beautiful and easy to design with.

We'd love to see what you create!! I hope you will join us for our challenge at Poppystamps! The theme this month is "Fly Away With Me". You can spin this challenge in lots of directions - butterfly wings or a trip your special place!


Finished Size 4.25 x 5.5"
Dies| Poppystamps Weeping Cherry Triptych, Butterfly Sprinkles

Stamps | Poppystamps Flower Patch

Friday, July 22, 2016

Happy Bird Day!

Cupcake Inspirations has a a fun challenge this time - Tropical!  Look at these yummy cupcakes with pineapple toppers!  How fun is that?  Perfect for summer!  It's been seriously hot and humid here in the midwest - I'm keeping up with my goal of walking more - I've been hitting the pavement at 7:30 am.. and it's still sweltering.  A big storm is rolling through so a little time to play while me and Miss Moriko cool down.   I need to take more pictures of her so you can see how big she's getting!   I'm glad I have her to keep me motivated and remind me to move it!  LOL!    

DH has been working nights so he's home in the day.  I love having him around!  We've gone out to lunch twice this week.  Today we stayed home and he cooked a big breakfast... maple bacon, eggs, and waffles.   I know.. I'm spoiled!   Well not completely.. I usually clear away all the dishes and wash the pans and stove.   Mr. J. is a little sloppy sometimes! 

Here's my take on Tropical - Pineapple pattern paper and pink Flamingos from Reverse Confetti!   Flamingo's always remind me of my son.  When he was a little guy he had a hard time with speech.  It wasn't unusual for us to make a game of charades when I didn't understand.  One time on vacation he was trying to call my attention to something he saw - (keep in mind he was probably around 4 years old) - I'm trying to figure out what hes saying.. I look down at him and he's standing on one foot!  Of course!  He wanted me to see the Flamingos!!!    Life is challenging sometimes, but we make it through.  And yes.. now that he is grown he speaks beautifully and we only play games when we're feeling silly.

I love the punny "Happy Bird Day" sentiment with this set - it still cracks me up!
I don't use black too much in my designs, but this time it made for striking contrast with the pink birds, and picks up the background papers nicely.  Reverse Confetti has lots of tag toppers so you can create lots of different looks with the same tag shape. 
 I hope you're staying dry and having a great day! 


Finished Size 4.25 x 5.5"
Stamps | Reverse Confetti Fabuous Flamingo
Dies | Reverse Confetti Fabulous Flamingo,  Topped Off Tag, Double Edge Scallop Border, Top O'The Tag, Stitched Flag Trio
Twinery Charcoal Twine
Pattern Paper | Pebbles Everyday 6"
Enamel Dots 


Thursday, July 21, 2016

Tis the Season - Twinery Ornament

It's Christmas in July at the Twinery! We're showing projects this week to help you get a jump start on your holiday decorating! I'm primarily a card maker so I need extra time to get one made for everyone on my list. I love Twinery Twine too! It is the perfect embellishment for taking things to the next level and adding lots of "oooooh" factor! 
Everyone loves a shaker card - this is a twist on the idea. Instead of creating a pocket to fill with sparkles, I created a panel of colorful Twinery Twine to layer under the ornament shaped die cut opening in my card.   This pretty ornament die is from Memory Box - it's called Emerson Ornament.
I started by water coloring a panel for the cover of my card. If you look close you'll see I splashed it with gold watercolor paint! 

Once it was dry I stamped a sentiment in the lower corner and die cut the ornament. I added double sided tape to the cover of my card base and adhered stripes of Maraschino and Lilac Twine. I love red and purple together - something about it is very regal. 
I made sure the entire die cut area was covered with twine a few times by laying the die cut panel on top of the card base. When no white was peeking through the opening I adhered the cover panel to the base with adhesive foam tape.
I adhered the die cut ornament inside the opening with liquid glue (Ranger Multi Medium Matte in a needle tip nozzle bottle) and embellished with some gold pearl gems.

A gold foil ornament cap and Twinery Gold Shimmer twine add extra sparkle to my card. This is a fun simple technique to use on your designs and will work with so many different dies. I hope you'll give it a try! 


Finished Size 4.25 x 5.5"
Twinery Twine | Maraschino, Lilac, and Gold Shimmer
Die | Memory Box Emerson Ornament, Ornament Caps & Hooks
Stamp | Memory Box Christmas Botanicals
Peerless Watercolors