Pages

Tuesday, August 31, 2021

Sparkly Ghost Greetings

Thanks for stopping by! I love Halloween and I love a sketch challenge so I thought I'd mix the two together today and play along at Sketch Saturday.


Here's this week's sketch. I love a sketch because it's like following a recipe. All the work has been done.. I just pull the stamp set I want to work with and follow the sketch.
I started with the element on the left and turned it into a label topped with some cute ghosts from the Pretty Pink Posh Halloween Circles set.

The tricky part for me was adapting the background to work with the stamped images. I decided on a monochromatic design. I inked a panel for the background with distress ink and then splattered it in darker shades of ink to look like the Copic colored ghost circle.
That still didn't seem like enough so I added a stencil design. I love stencils, but I sure don't use them often. They seem a little intimidatingly to me. I used Pickett Fence Studios Paper Glaze in Sparkle with the Pretty Pink Posh Brush Strokes stencil. They look like little ghosts.
 
A little more sparkle is always welcome here so I added some Amethyst jewels for a little eye candy. The blue Halloween card is unexpected but I'm sure glad I tried it - and the stencil!


Finished Size 4.25 x 5.5"
Stamps | Pretty Pink Posh Halloween Circles
Dies | Pretty Pink Posh Halloween Circles
Stencil | Brush Strokes
Jewels | Pretty Pink Posh Amethyst
Paper Glaze | Picket Fence Studios Paper Glitz Sparkle

PPP = Pretty Pink Posh
SSS =  Simon Says Stamp
PFD = Picket Fence Design

Halloween Circles
Halloween Circles

PPP | SSS
Halloween Circles
Halloween Circles

PPP | SSS
Halloween Wreath
Halloween Wreath

PPP | SSS
Brush Strokes
Brush Strokes

PPP
Amethyst Jewels
Amethyst Jewels

PPP | SSS
Crystal Katana
Crystal Katana

PPP | SSS
Paper Glitz Sparkle
Paper Glitz Sparkle

SSS | SCB | PFD
Mixed Media Spatulas

SCB | PFD

Simple Stories Spooky Nights Collection

Well hello there! I’m glad you stopped by for a visit! I’ve got NINE cards to share today made with the Simple Stories Spooky Nights Collection! I guess I got a little carried away, and that was easy to do because Halloween is my favorite holiday, and when you have this much goodness to work with time just flies!
This collection is available in both the 6 x 8” paper pad as well as the 12” collection kit. Normally I gravitate to the pad because the prints are slightly smaller, but this time I went for the 12” collection kit. The 12” pages include a big sheet of tags, and another sheet of journaling cards and tabs and a full size sheet of stickers too.
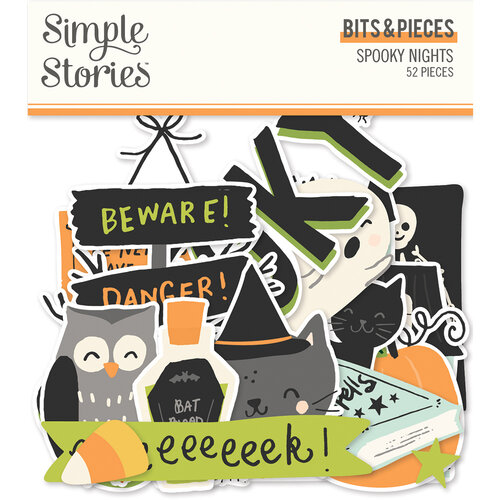
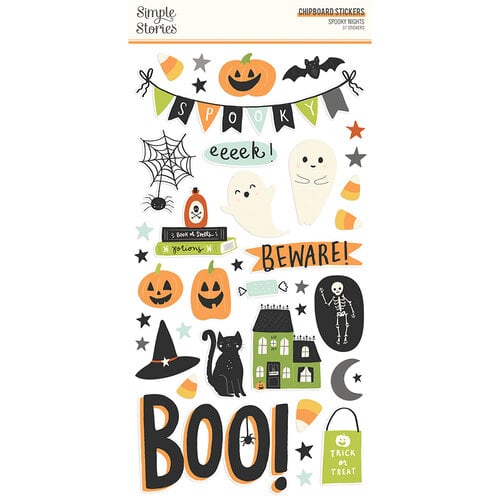
You’ll love the chipboard, Bits & Pieces printed die cut pieces, and journaling bits for arranging scenes and collages for your card fronts.
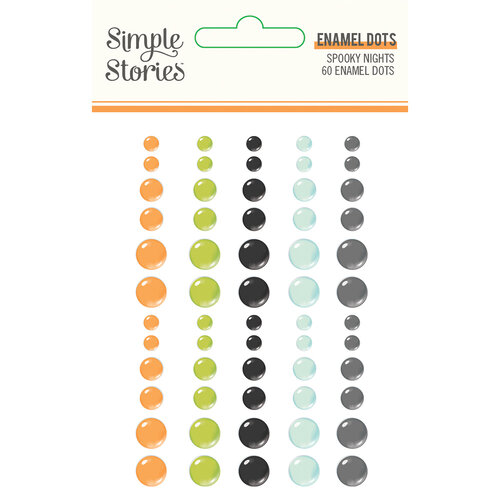
I love all the little extras – what I call the eye candy… enamel dots, decorative brads and trio of washi tape patterns all coordinated to work together perfectly!
The papers are traditional orange and black with a pop of lime and aqua. The printed papers include stars, stripes, candy corn, dots, and plaids.
If you like to add a bit of solid papers to your designs, you’ll find Color Vibe cardstock in Orange, Pumpkin, Lime, Green, Mint, Gray, Charcoal, and Black. I use it to add a matt layer to my cards and to break up the prints.
I created a scene on this card by cutting waves of pattern paper for a hilly landscape. The sky is lime with black stars. A journaling card breaks up the prints to make the haunted mansion the focus of the design.
I used another journaling card in lime to take your focus from the busy stripes to the cute ghosts in the foreground.
For this card an oval journal bit takes center stage and is topped with lots of embellishments. Stickers are great layered over seams where paper layers meet, and washi adds another layer of color and texture.
You’ll have fun making lots of cards for family and friends, and you’ll have plenty left over for embellishing tags and treat bags for your favorite trixies!


All cards finished size 4.25 x 5.5”
Simple Stories Spooky Nights Collection Kit
Simple Stories Spooky Nights Bits & Pieces
Simple Stories Spooky Nights Journal Bits & Pieces
Simple Stories Spooky Nights Chipboard
Simple Stories Spooky Nights Decorative Brads
Simple Stories Spooky Nights Enamel Dots
Simple Stories Spooky Nights Washi

SS = Simple Stories
SCB = Scrapbook Dot Com
CH = A Cherry On Top


Spooky Nights Collection Kit
Shop at:
SS | SCB | CH
Spooky Nights Bits & Pieces
Shop at:
SS | SCB | CH
Spooky Nights Journal Bits
Shop at:
SS | SCB | CH
Spooky Nights Chipboard
Shop at:
SS | SCB | CH
Spooky Nights Decorative Brads
Shop at:
SS | SCB | CH
Spooky Nights Enamel Dots
Shop at:
SS | SCB | CH
Spooky Nights Washi
Spooky Nights Washi
Shop at:
SS | SCB | CH

Monday, August 30, 2021

Dreaming of Fall

Are you dreaming of fall? If you're not, just one look at the Pretty Little Studio Grateful Heart Collection will have you thinking of sweater weather!
  
When working with a collection I like to lay out all the embellishments and arrange them on a piece of plastic the size of my card front. For this one I started with a plaid frame from All The Feels and arranged die cuts on top of it.

I added a pretty Floral Centerpiece floral arrangement, coffee cups, oak leaves and flowers. Some of the elements are adhered flat to the card base while others are adhered with adhesive foam tape. This adds dimension and depth to the design.
A little tag at the top of the frame, and a "dreaming of fall" sentiment along the bottom of the arrangement are all the words necessary.
So are you dreaming of fall now? I know I am.. these hot August days are just the thing to make me wish for cooler weather! Have a great day!

Saturday, August 28, 2021

Art Deco Birthday Card


Thanks for stopping by! I hope your weekend is off to a good start! Today I'm sharing a birthday card that has an art deco flair. I've given it a modern twist with lots of color that would make this one ideal for just about anyone on your list!
I confess the arches in the detailed die reminded me of peacock feathers - that's how I decided on the shades of blue and green.
My die cut machine is getting older and having trouble cutting completely through a detailed die without a metal shim. I'm using that to my advantage today by cutting the die just so I can get an imprint of the pattern on my card stock. I used the imprinted image as a guide to help me color the panel with markers. If you're machine is in tip top shape you can add some shipping tape to the back of your card stock to make it harder for the die to cut through completely.
  You don't have to be too careful about coloring just as long as you don't enter another area of the design because when you're finished coloring you will top your pretty colored sheet with a detailed clean die cut panel. I keep one handy so I can make sure I didn't miss anything before I adhere the two together.
Of course you won't want to cover that pretty panel, so I stamped a sentiment on vellum with Staz On ink. I topped the sentiment with a rectangle frame die before adhering it to the assembled background panel. Vellum can be a little tricky to adhere because adhesive will show through the vellum. The frame allows you to adhere it without putting any adhesive on the vellum at all keeping it very clean.

I hope you'll try this technique to add a little color to some of your die cuts. It's much quicker than an inlay and still packs a punch!


Stamps | Poppystamps CL499 Art Deco Birthday
Dies | Poppystamps 2410 Arched Deco Plate, 1996 Double Stitch Rectangle

POPPY = Poppystamps
SSS = Simon Says Stamp

Double Stitch Rectangle Frames

POPPY | SSS
Arched Deco Plate
Arched Deco Plate

POPPY | SSS
Art Deco Birthday Greetings

POPPY | SSS

Thursday, August 26, 2021

Jungle Birthday

Today I'm playing along at the "As You Like It" Challenge where this time they're asking for your favorite wild animal and why. I'm an animal lover so this is a tough question for me... I love them all, but this time I'm going with MONKEYS because they're such cheeky little critters.
  
My card is made with the Waffle Flower Jungle Birthday set. I colored all the images with Copic Markers and arranged them on a piece of clear plastic the size of my card base.

The clear plastic makes it easy to slide different colors under my arrangement to help me decide what looks best to my eye. This time I went with sunset colors of Distress Oxide ink.
I adhered the foliage flat to the card base and the animals with adhesive foam tape to add dimension and depth to the design.
I hope you're smiling and that you find some time to play too! I wonder what animal you'll choose!


Finished Size 4.25 x 5.5"
Stamps | Waffle Flower Sending Love, Jungle Birthday
Dies | Waffle Flower Jungle Birthday

WFL = Waffle Flower
SCB = Scrapbook.com
SSS = Simon Says Stamp
Sending Love Sentiments
Shop at:
WFL | SCB | SSS
Jungle Birthday
Jungle Birthday
Shop at:
WFL