Thursday, February 28, 2013

Waltzingmouse Design Team Blog Hop

Waltzingmouse is hosting a blog party today to introduce you to the new Design Team. The Mischief Makers have been included in the group along with the existing members to bring you loads of creative inspiration. We were asked to choose our favorite Waltzingmouse stamp set and show off our style.

Sounds easy right? Wrong! There are so many beautiful Waltzingmouse sets to choose from! How to pick??? I decided on the Vintage Garden Seed Packet because I think it best defines me. I am a gardener and I love color - the classic vintage look and all the detail in the images can be dressed up to look so elegant. I got a little carried away in my excitement and made three projects to show you different looks you can achieve with this set.
I used the vintage Garden Giant Bundle Cut Files  to create the seed packet frame.  The cut files are available for  $1.50 US and make fussy cutting that window obsolete. 
For my Hyacinth card I stamped in Imperial Purple on rustic cream paper and left the seed packet frame  off.  I added a little twine bow to add to the natural beauty of the flowers.
 Last I made a little gift tag that would look amazing on a gift or even a basket of produce from the garden.  The tag is from the cut files and I stamped in Satin Red ink.  I love how you can add so much color to the images without actually pulling out your markers. 
Keep on hopping to meet the rest of the Waltzingmouse Design Team and get to know their style - I know you will love seeing their creations and see lots of fabulous ways to use your favorite Waltzingmouse Stamps!
Jeanne Jachna   (That's Me!)

Thanks for stopping by!  Have a fantastic day!

Jeanne
Vintage Garden - FlowersVintage Garden - ProduceVintage Garden - Seed Packet
Supplies Used:
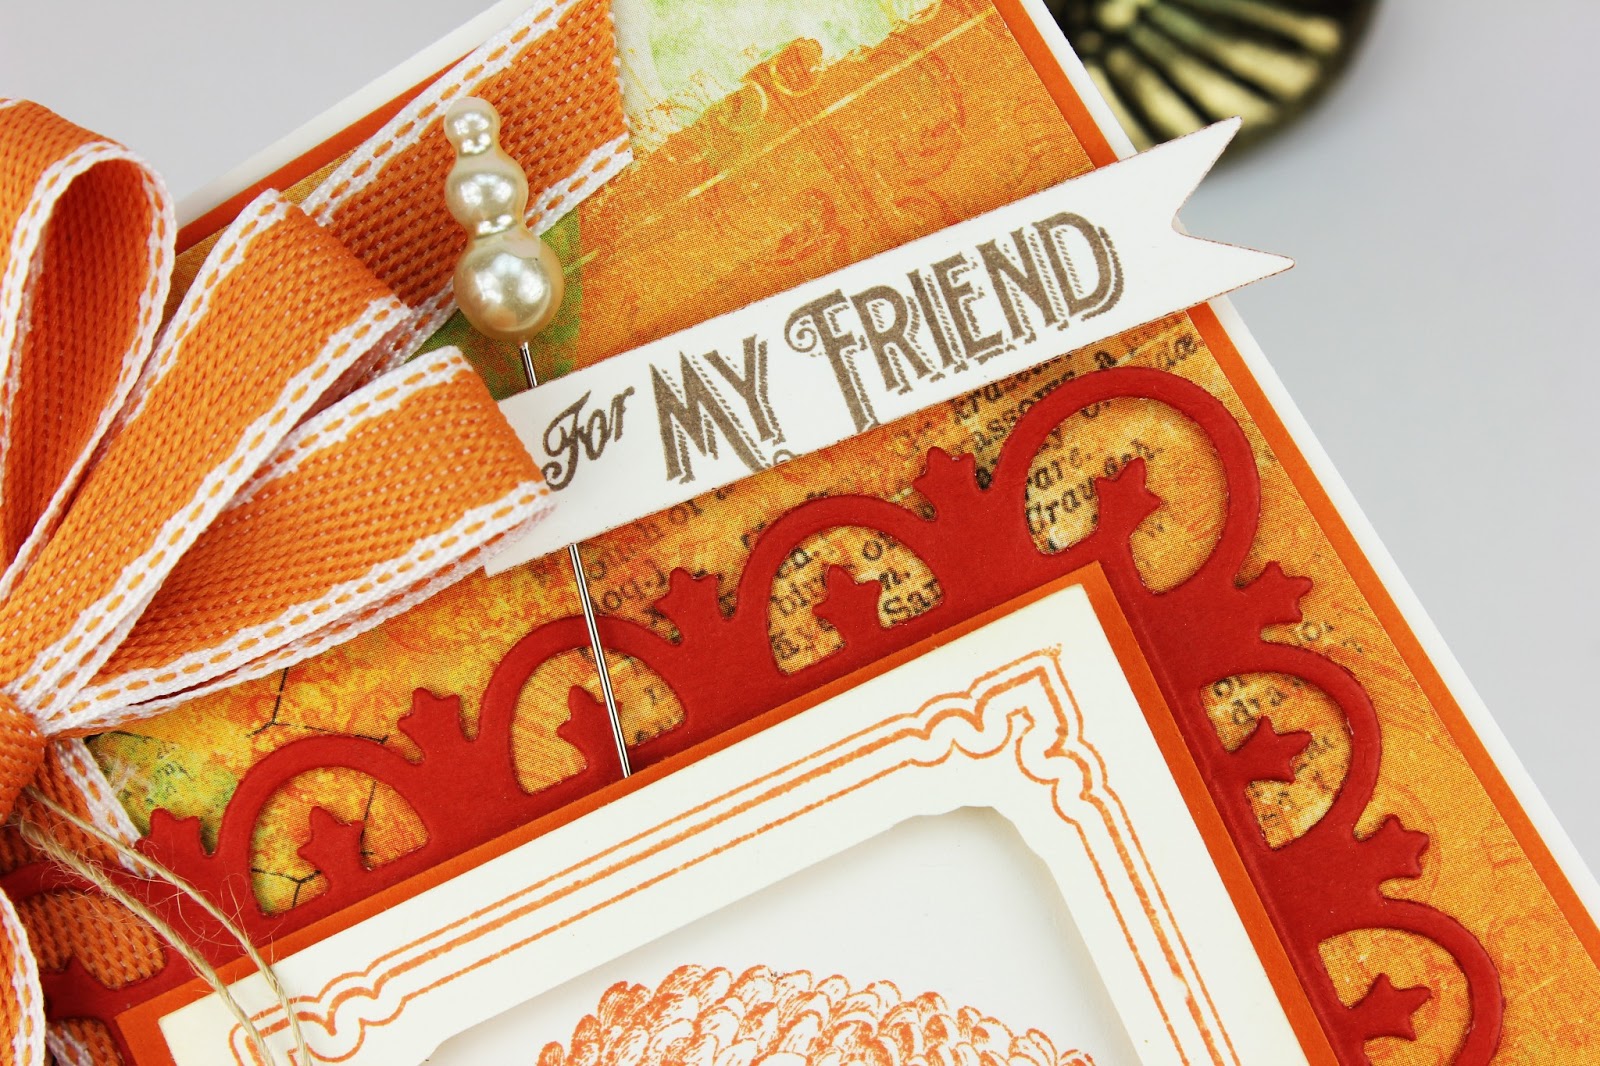
Chrysanthemum Card  Finished Size:  5" x 7"
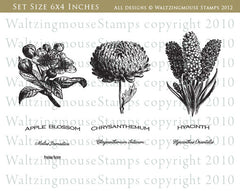
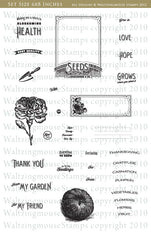
Stamps:  Waltzingmouse Vintage Garden Seed Packet, Vintage Garden Flowers
Cut Files:  Waltzingmouse Garden Giant Bundle
Pattern Paper: Bo Bunny Country Garden Collection "12" Country Garden"
Card Stock:  Papertrey Ink Terracotta Tile, Vintage Cream, Orange Zest
Dies;  Spellbinder Fleur De Lis Rectangles, Nested Lacey Pennants
Pearl Hat Pin:  RIbbon Reel
Button
Button Twine Natural May Arts, 1/2" Ribbon Stitched Polly Peach Parfait Stampin Up!
Ink:  Versamark Vintage Sepia, Stampin Up! Tangerine Tango

Hyacinth Card  Finished Size: 5" x 7"
Stamps:  Waltzingmouse Vintage Garden Seep Packet, Vintage Garden Flowers
Cut Files:  Waltzingmouse Garden Giant Bundle
Pattern Paper:  Pink Paislee London Market Collection "Kensington"
Card Stock:  Papertrey Ink:  Rustic Cream, Royal Velvet
Dies:  Spellbinder Classic Rectangles, Cheery Lynn Fiona's Magic Window
Button
Button Twine Natural May Arts, 5/8" Organic Cotton Stripe Purple May Arts (Ribbon Reel)
Ink:  Versafine Imperial Purple
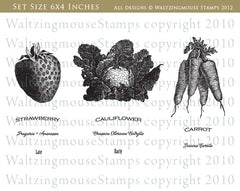
Strawberry Tag
Stamps:  Waltzingmouse Vintage Garden Seep Packet, Vintage Garden Produce
Cut Files:  Waltzingmouse Garden Giant Bundle
Card Stock:  Stampin Up Very Vanilla
Dies:  Spellbinder Tags Trio
1 1/2" Wired Red Satin Kirkland /Costco
Button Twine Natural, Twisted Burlap Natural May Arts
Ink:  Versafine Satin Red

Wednesday, February 27, 2013

Case Study #130 - Pin Money


Hi and thanks for stopping by to visit with me today! I hope you are doing well - I'm keeping busy with lots of exciting things coming up!  There is a big bake sale on Friday to help the Boy Scouts so I expect I will be baking all day tomorrow - what sounds good?  Peanut butter cookies, pumpkin bread, brownies?  Sounds like trouble to me - the cook has to make sure everything tastes good and is up to snuff right?    

Here is the latest inspiration photo from CASE Study Challenge.  This is the last week for our month long muse Teri  Anderson from A Bit of This, A Bit of That.   This one was just so much fun!  I love all the embellishments and the little pocket for a private note or maybe a gift card or cash.  I loved the layout on this one and just switched up the theme. I used a sewing theme and made my own little "pin money" sign that I printed using Word.  Just pull out some embellishments and let them do all the work for you!  


I picked up on that orange polka dot pattern and went from there.  I am loving orange and yellow lately - I think I'm just craving some color or maybe spring.  It is still so grey looking here in the Midwest - bare trees and November skies if you know what I mean.
If you need a little more inspiration why not see what the design team came up with for this one?  They will be sure to inspire you!

Our guest designer this month is Sylvia Blum of Sylvia's Stamping Place

Chupa - Iwona Palamountain
Amy Wanford
Andrea Ewen
Christina MacLaren
Clare Buswell
Debbie Hughes
Jean Martin
Maureen Plut
Teneale Williams

Hope I see you over at CASE - and I can't wait to see what you'll do with this!


Hugs!
Jeanne

Supplies Used:  Finished Size  4.5 x 6.25"
Stamps:  Papertrey Ink Hanging by a Thread, Button Boutique
Pattern Paper:  Echo Park For the Record 2 "Bouquet"
Card Stock:  Papertrey Ink Orange Zest, Kraft, Vintage Cream, True Black, American crafts Silver Foil
Dies  Papertrey Ink Button Boutique, Hanging By a Thread, Scissors by Quikutz 4x4", Cheery Lynn French Pastry Doily
Twinery Mandarin Twine
May Arts Button Thread Ivory
Versafine Vintage Sepai, Onxy Black, Habanero
1/4" Corner Rounder Crop A Dile We R Memory Keepers
Buttons Stampin Up!
Ruler Ribbon and Orange Zig Zag by Ribbon Trends Hobby Lobby
Pins Crystal Basic Grey, Pearl Crown Wild Orchid Crafts
Mini Clothes Pin, Glitter

12 Kits of Holidays - February Edition

Welcome to the February Edition of the 12 Kits of the Holidays.   Here's how it works... there are 12 designers each assigned one month of the year.  The hostess of the month creates a "kit" to send to the other 11 members.  We all receive the same kit to work with and post our creations on the last day of the month.  It's fun and interesting to see the different ways we all use the same supplies.  The group originally started by making Christmas cards every month as a way to get ready for the holiday.  This year we are trying something different and alternating between other holidays and Christmas.  

This month we're celebrating Christmas and our hostess is Renee from It's a Patchwork Life.  Renee gave us stamped and precut images from Waltzingmouse Stamps along with pretty paper from Echo Park, and lots of die cuts and trims.    Just check out the photo of all the goodies!  This kit was so well put together with everything well coordinated that cards were really easy to assemble.  I made FIVE this time and I think I could have kept going! 


Now for the fun part - showing you everything I put together with this fun kit.


Whew!  Tired yet? I hope not because lots more beautiful creations are just a mouse click away!  Check out the designs from the rest of the group!


Thanks for stopping by!  Have a great day!!

Jeanne

Supplies Used:  Finished Size 
Stamps:  Waltzingmouse Yonder Star, Woodenheart ALphabet
Pattern Paper;  Echo Park This and That Christmas Collection
Cardstock:  My Favorite Things Gumdrop Green, Papertrey Ink Rustic White, Dark Chocolate, Pure Poppy
Ink:  Momento Bamboo Leaves, Stampin Up Real Red and Chocolate Chip
Dies:  Memory Box Deer Trio, Papertrey Ink Alpha Blocks, Parisian Doily, Wplus9 Stacking Stars, Waltzingmouse Yonder Star Cut Files
Buttons:  My Favorite Things Gumdrop Green, WIld Cherry, Hot Fudge

WM Monday Morning Red Carpet Challenge

All about the detailing: (L-R) Zoe Saldana in Alexis Mabille Couture, Olivia Munn in Marchesa and Kerry Washington in Miu Miu all opted for dresses with embellished bustsDid you see the new challenge Claire posted over on the Waltzingmouse Makes Blog?  It's a Monday Morning Red Carpet Challenge!  I didn't watch the Oscars - I'm usually in my scrap room winding down after dinner has been eaten and the dishes washed and put away.  If you did you saw all the gorgeous actresses walking down the red carpet in their designer gowns.  The challenge is to choose one of the dresses and use it as inspiration for a project.    One random winner will receive the You're Lovely stamp set.   You can get all the details as well as a link to a site with lots and lots of Oscar photos here.

Here's the inspiration photo I chose - it's Olivia Munn in a Marchesa  gown.   I love the flowing red satin bottom that is wrapped almost like a sarong,  and the fancy gold embroidered bodice.  I tried to replicate the gold embroidery with gold embossing and trims.  Had to use a red satin ribbon and of course a sprinkle of gems never hurts!   Of course with all these elegant embellishments I chose a fancy script sentiment to match.  I simply stamped it on cream paper and fussy cut it.  

It should be interesting to see the dresses and matching designs get linked up! 

Jeanne


Supplies Used:  Finished Size 6.25 x 4.5"
Stamps:  Waltzingmouse Florentine Frippery, Big Day Additions
Card Stock Papertrey Ink Pure Poppy, Vintage Cream, Graffix Gold Foil Board
Die Cuts:  Spellbinder Labels 24, Cheery Lynn French Pastry
Ribbon:  7/8" Red Satin His & Hers (Hobby Lobby)
Gold Embossing Powder ZING!
Ink:  Versafine Onyx Black
Gems:  Recollections (Michael's)

Tuesday, February 26, 2013

WPlus9 Monday Mood Board #3 - Pink, Brown & White

Today I'm playing along with the WPlus9 Monday Mood Board.   Just looking at this gorgeous inspiration board had me drooling and sent me straight to my stamping space!  The colors are just so yummy they remind me of Neapolitan ice cream!    I think Dawn did most of the work since she has a finished card right there on the inspiration board.  I love the bitty tags, butterflies that look like they were dipped in chocolate and fancy doily. Well I said it looked yummy right?  Then she topped it off with pretty buttons and shimmery ribbon.  I just couldn't resist!
I embossed white on the pink card stock and I double stamped the butterflies.  I think the white ink softens them up a bit and the lacy pattern helps incorporate them into the design.  The bottom butterfly is the mesh pattern, and the top butterfly is the lace pattern.  I used WPlus9 White Pigment Ink.  I've been looking for a good white stamp pad and I really like this one.

The Happy Anniversary tag is a die cut pennant, with the lace pattern just stamped on the end in a soft pink.  

Here is my finished card


Thanks for stopping by!  You can check out the other designs and get the details for the WPlus9 Mood Board here.

Jeanne

Supplies Used:  Finished Size 4.5 x 6.25"
Stamps:  WPlus9 Chantilly Trim, Very Vintage Greetings
Card stock:  Stampin Up Pretty in Pink, Papertrey Ink Vintage Cream, Dark Chocolate
Dies: Cheery Lynn French Pastry, Spellbinder Fanciful Flight, Nested Lacey Pennants, Classic Ovals
Ink:  WPlus9 White Pigment Ink, Versafine Vintage Sepia
Zing! White Embossing Powder
Pearls, Buttons 
Natural Button Thread May Arts (Ribbon Reel)
Ribbon 5/8" Ivory Taffeta from Robert Stanley Collection (Hobby Hobby)

Friday, February 22, 2013

WP9MMB - Happy Anniversary


I have to admit that WPlus9 Stamps are one of my latest obsessions.  There are only a handful of companies that I am absolutely addicted to and this is one of them.  Perhaps you are too.  So you probably know about  the Cloud9 Blog Hop with their monthly challenges, but did you know about the WPlus9 Design blog challenge they have on Mondays - The Monday Mood Board?  Well I've just discovered it am planning to start playing along there regularly.  This is a good way for me to use my stamps and see all the other fab things I can make from the other entries I see posted there. 


I loved all the ingredients I saw in the inspiration photo and actually started going around my craft room grabbing some of the things I saw in the photo - like the doily, lace, buttons, and clothes pin.  I don't usually play color challenges because my brain doesn't work that way - I'm more about the images and shapes I see.  This one was good because although it is a color challenge, a photo was provided to inspire.

I started out with the stamped doily and sentiment.  I used the ledger stamp from Class Act to stamp the numbers over the sentiment - sort of a count down. - like how many years have you been married.  It is to mimic that bit of plaid on the tag in the photo.  The crochet flowers are from my mom - she makes them for me with her left overs from projects.  These have a bit of metallic gold in with the brown thread.  I cut my felt rolled flower twice for a bigger fuller flower.

Here's my finished card - hope you like it!
Thanks for stopping by for a look - I hope you have a great weekend.  

Jeanne

Supplies Used:  Finished Size 5.75 x 5.75"
Stamps:  WPlus9 Class Act, Chantilly Trim, Lacey Layers, Very Vintage Greetings
Dies:  Couture Creations  Blossom Yarn, WPlus9 Lacey Layers & Scalloped Border Die, SIzzix Flowers 3-D
Pattern Paper:  Authentique Original Collection 6x6" Pad
Card Stock:  Stampin Up Night of Navy, Crumb Cake, Papertrey Ink Vintage Cream
Ink:  Stampin Up Calypso Coral, Versafine Onyx Black
Button Thread Bittersweet May Arts, 1/2" Natural Burlap May Arts, 7/8" Cluny Fan Simplicity
Miscellaneous, Clothespin, Felt, Pearls, Button - Crochet Flowers from My Mom - Thanks Mom!

Wednesday, February 20, 2013

CASE STUDY #129 - The Journey


I hope everyone is having a good week! Things are getting back to normal for me. I'm feeling better from my cold and trying to get caught up on the housework that was left undone when I didn't feel up to it. Funny that my crafting didn't fall by the wayside - things took a little longer with my fuzzy mind but it would take a lot to keep me from my craft room. I guess I have my priorities straight HAHA!!

Today I'm posting for the new CASE Study Challenge. Our muse this month is Teri Anderson from A Bit of This, A Bit of That. I don't think I can clearly define Teri's style, she can be all C&S and then hit you with something with lots of embellishments.  Take a look at the inspiration for this week and you'll see what I mean.  Looks like a good mix of both to me.  I love the bold colors and the way she added the ribbon and twine  to make this card so fun!  
To play along with case all you need to do is study the inspiration photo and select the elements that inspire you.  For me it was the colors and the clean look of her card.  I stuck with the same aqua card base and made my own rainbow of lotus flowers in the same colors Teri used. To mimic the three flowers with twine I added three little red lanterns. And here is my finished card.
Need a little more inspiration? Why not check out what the rest of the Case design team did with this one. Just click on their names below to hop to their blogs.

Sylvia Blum of Sylvia's Stamping Place
Chupa - Iwona Palamountain
Amy Wanford
Andrea Ewen
Christina MacLaren
Clare Buswell
Debbie Hughes
Jean Martin
Maureen Plut
Teneale Williams

I hope you find some time to play along this week!  Thanks for stopping by for a visit!

Jeanne

Supplies Used: Finished Size 5" x 7"
Stamps: Waltzingmouse Asian Gardens, Asian Garden Additions
Cardstock Stampin Up Pool Party, Papertrey Ink Stampers Select White
Twine: Twinery Mandarin, Blossom, Maraschino
Ink: Stampin Up Pool Party, Tangerine Tango, Real Red, Pretty In Pink, Daffodil Delight, Versafine Onyx Black

Tuesday, February 19, 2013

SSCB#6 - Anything Goes

Hi everybody!  Hope you are doing good.  I am feeling much better - getting over my cold nicely!  YAY!!  So good to be getting back to normal! I hope you all are doing well too!  Today I am giving you a taste of the new challenge at Serendipity Stamps Challenge Blog.  The design team was asked to use their stamps in an unusual way.  Sounds interesting huh?  We were to take stamps that might be considered for a specific holiday, time of year or event and use them for something other than that purpose.

I selected this summery porch scene and incorporated a jack o lantern into the design from a Halloween stamp. Two things that you wouldn't normally think of putting together right?  Wait til you see the other DT designs - they are fun and amazing - so creative too!  To participate in the challenge you can use ANY Serendipity Stamps design - sky's the limit - and make any card for any occasion - anything goes.  
I was going for a masculine look to my summer porch scene.  I'm really missing the warm summer days - sitting on the porch and reading the mail or the newspaper - hence the stamping on the newspaper and the wood paneling border on bottom.  I added the fancy corner dies to mimic some ornate woodwork you might find on an old country porch too.

I'm sorry to say that Helen Berry has decided to leave the team due to other obligations.  She will be missed - but  I know she'll be close by!  I wish her the best and have really enjoyed working with her on the Serendipity team.    I hope you will stop by the rest of the design team blogs and see what they created for this challenge - you won't be disappointed.


I'd really love it if you would join us over at the challenge.  The site is still new and we're trying to get the word out there.  I love seeing what you come up with!  Oh yes..... the sale this week is 40% off your highest priced item trough February 27- use coupon code "40fromhigh213".

Hugs!
Jeanne
Screen DoorTrick or Treat LettersRest Relax
Supplies Used:  Finished Size:  5" x 7"
Stamps:  Serendipity  Screen Door, Trick or Treat Letters, Rest Relax
Pattern Paper:  Echo Park This & That
Die:  Spellbinders Lattice Accents
Card Stock: Papertrey Ink:  Kraft, True Black, New Leaf
Ribbon 3/8" Velvet Ribbon Parrot Green, Button Thread Natural - May Arts
Button
Ink:  Versafine Onyx Black

Sunday, February 17, 2013

RR#47 Let's Ruffle - Purple Princess


Wow! Sometimes I get so caught up in the inspiration photos for challenges. It's easy to see how Pinterest has become so popular.  I mean seriously gorgeous pictures and unlimited inspiration!  Look at this yummy princess cake photo from the Ribbon Reel Challenge this week.  


This one was chosen by Lenet.  It's called "Lets Ruffle" and guess what?  Yep!  You're supposed to use the colors in the photo and ... ADD RUFFLES!!  Well of course you are!  Sometimes it is hard to find a ruffle that you in the store, but  there are so many clever ways to make your own ruffles.  I seem to always fall back on one of the easiest ways I know.  You need to have wired ribbon - I used a 2" wired organza in light lavender.  I cut a 12" length and grabbed the bottom wire from both ends and worked the fabric to the center ruffling the ribbon as I went.  Easy peasy right?  

I topped this with a satiny ruffled trim in a deeper shade of purple.  For the background - seems I can never find purple paper in a shade I like - so I made my own. I just cut a background die and stamped the inserts in alternating shades of lavender and then popped them back into their frame.   The crown got me thinking of a princess and this is the sweetest one I could think of - it's Emma from Paper Sweeties.  Isn't she cute?  The "I'm Having a Tea Party" set has a vase full of flowers. I just inked up the flowers and stamped them along the hem of the dress and colored it with Copics.
Need a little more ruffle inspiration - or just want to see what the DT did with this one?  Just click on their names below.

Got some ruffled ribbon already?   Maybe you have a way to make your own?  Well what are you waiting for?   Come join us at the Ribbon Reel Challenge Blog for more ruffled goodness!

Jeanne

Supplies Used:  Finished Size 4.25 x 5.5"
Stamps:  Paper Sweeties PSE Emma, PS54 I'm Having A Tea Party, PS49 Dream A Little Dream,  Papertrey Ink:  Happy Harlequin
Dies:  Papertrey Ink Happy Harlequin
Copic Markers
Cardstock:  Papertrey Ink Vintage Cream, Stampin Up Perfect Plum
Ink:  Tim Holtz Ranger Distress Milled Lavender, Momento Sweet Plum, Tuxedo Black
2.5" Wired Organza, 1 1/2" Ruffled Purple Satin Organza